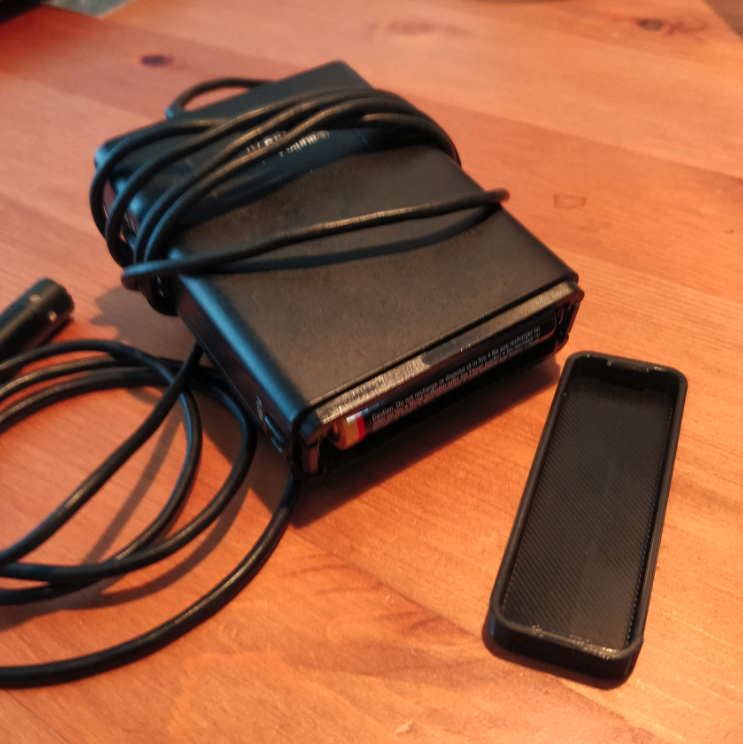
Another quickie: I finally lost the battery cover to my AT Pro 70 lavalier microphone. Whipped this up right quick and sent it to the printer. Got the dimensions and curvature right on the first try!
If you rather just purchase one from me, head over to the store, where apparently I’m the leading supplier of AT lavalier microphone parts and accessories in the world. This is the life I have chosen.
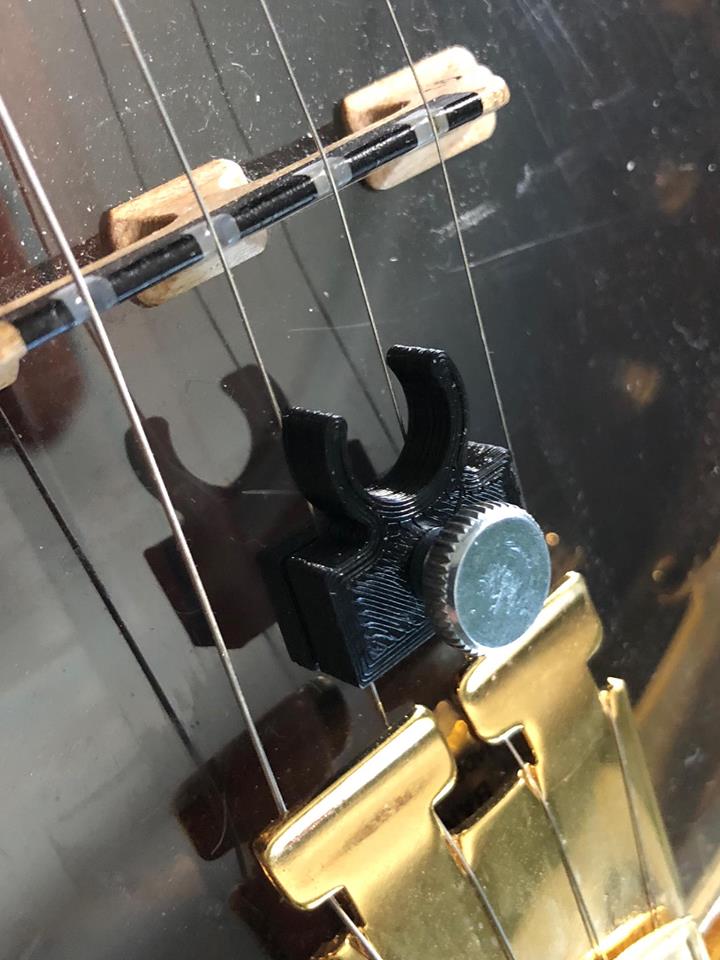
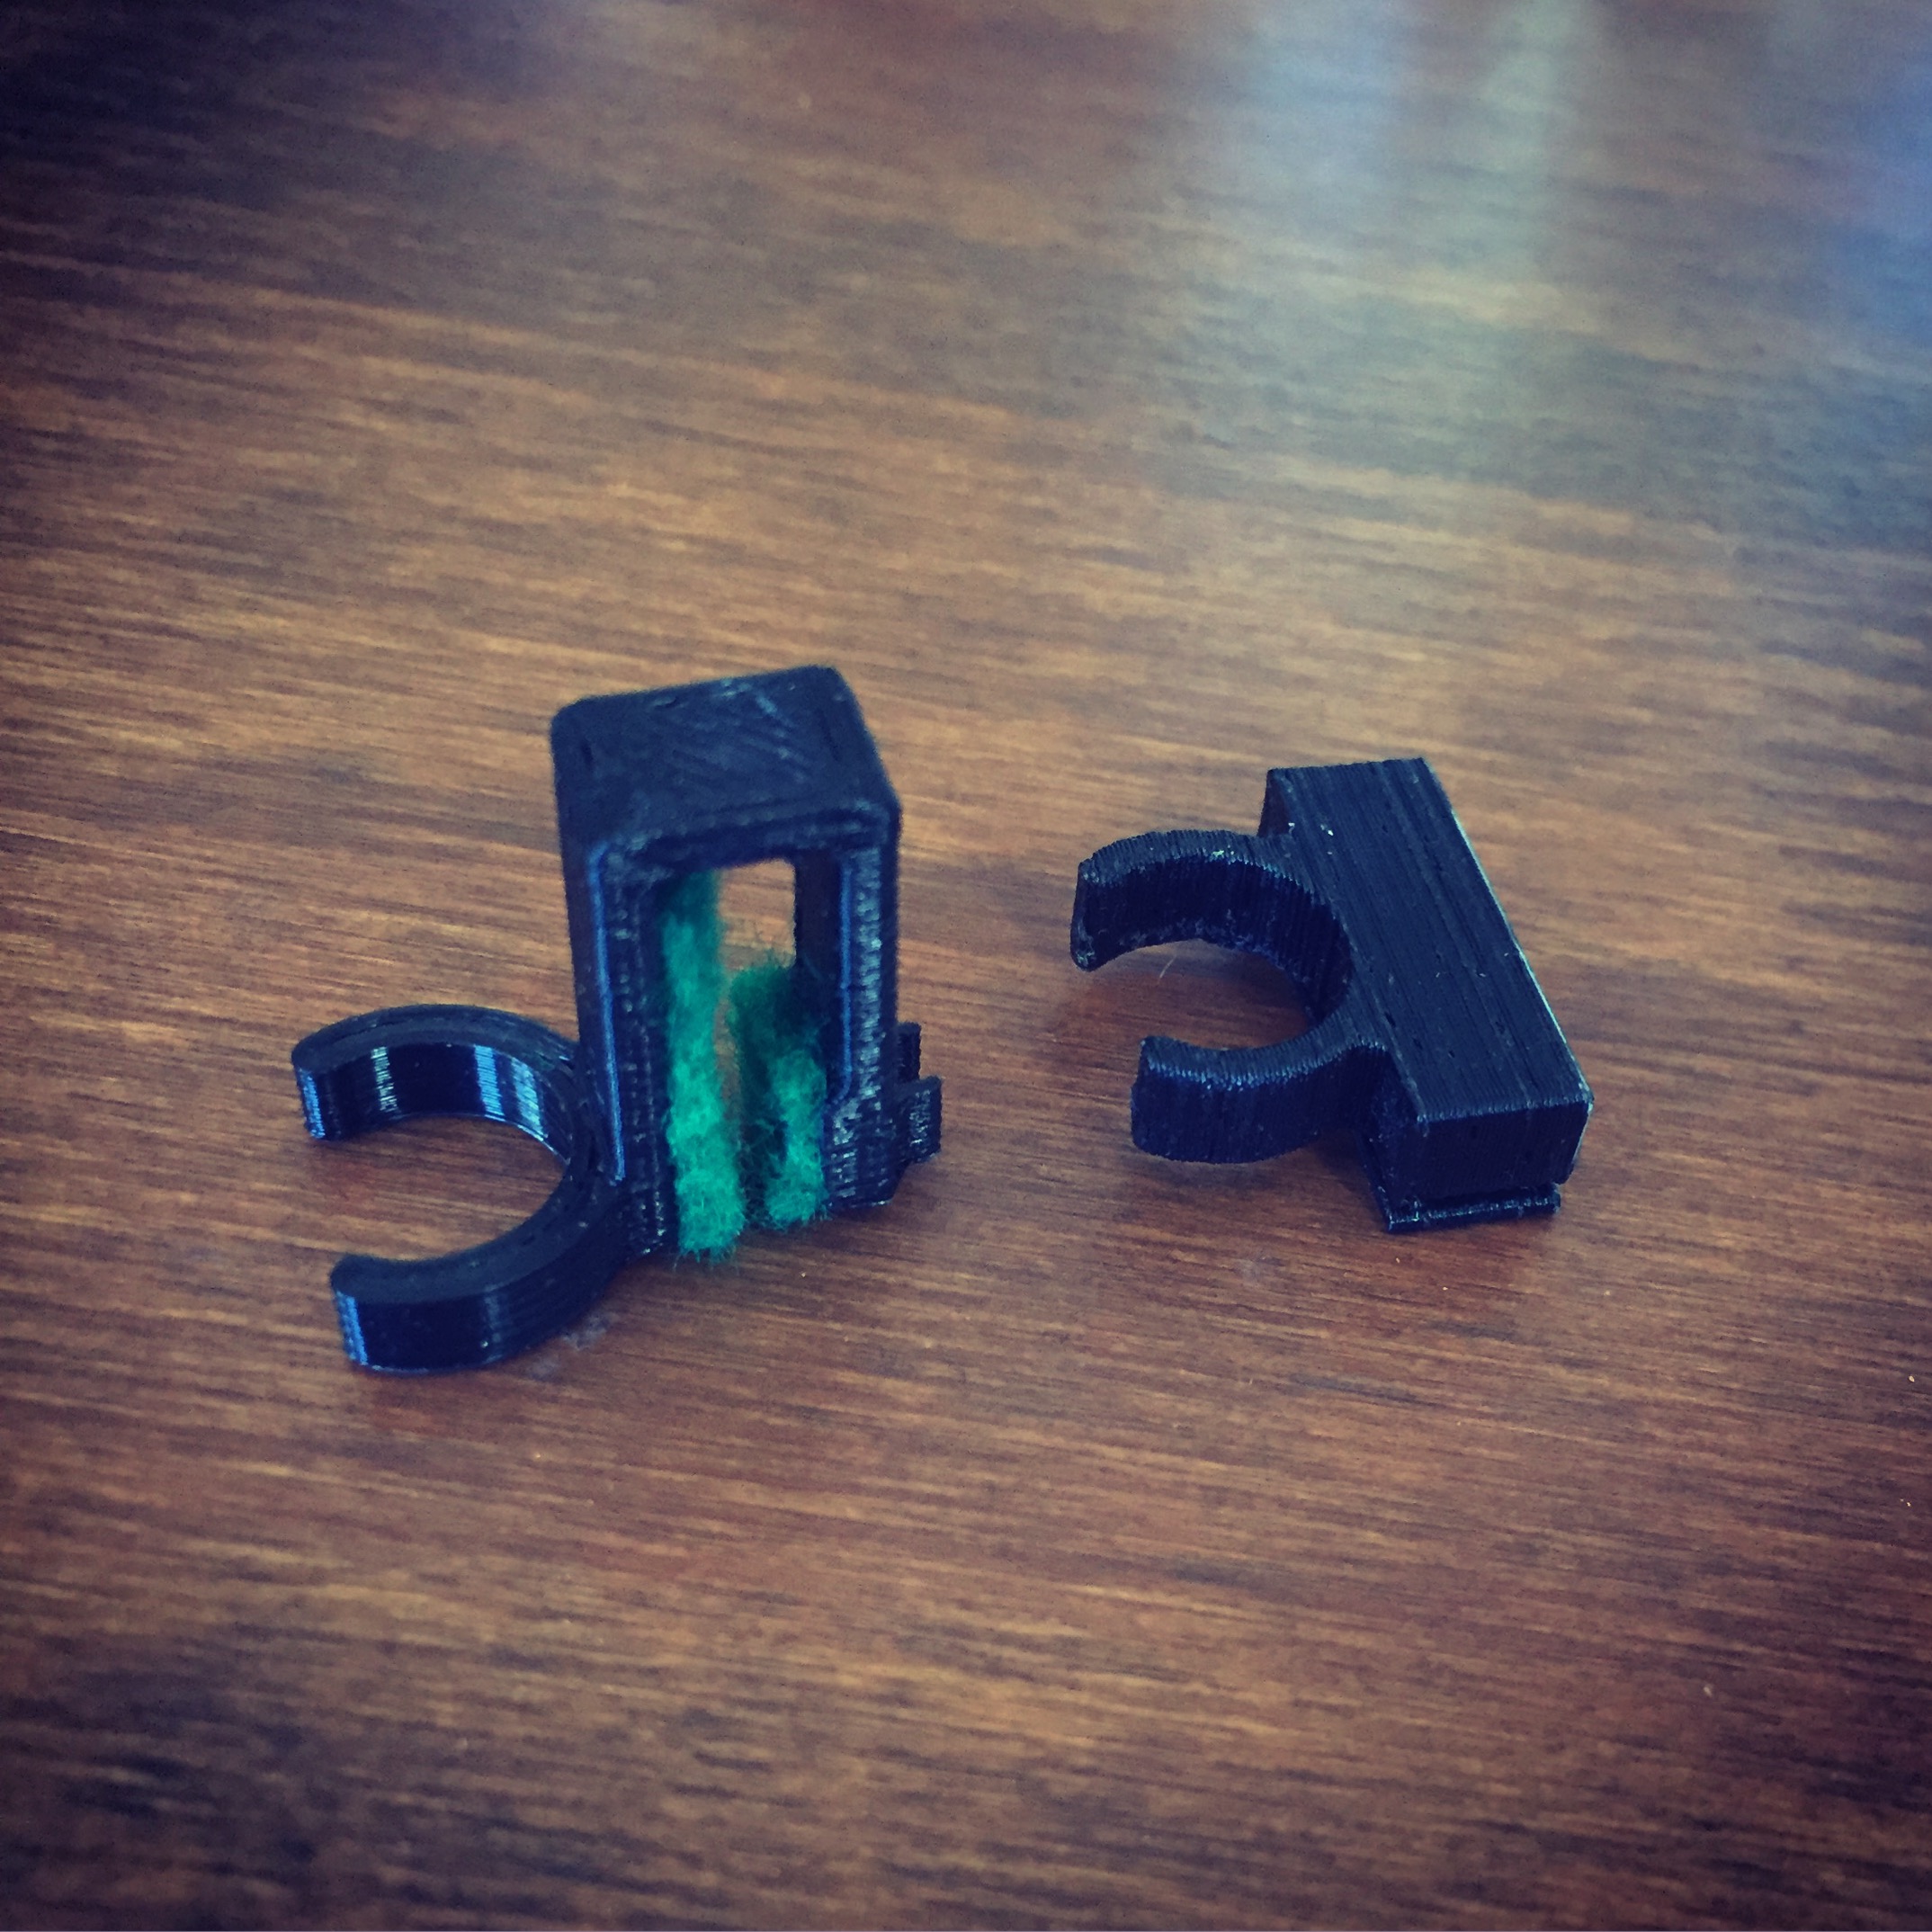
A banjo-playing colleague came across one of my AT bridge mounts and liked it, but found that the fit was quite loose on thin-string gauges, which are common on banjos. We went back and forth a bit trying to adjust the clearance gap, but at such tight tolerances, results were mixed.
It then occurred to me to make a more universal adjustable model. I had some M3 threaded inserts left over from a previous project so I simply separated the halves of the string clamp sections and made it so they attach to each other and tighten down with a thumbscrew. Now any gauge of string should work, including bass strings if you’re feeling lucky!
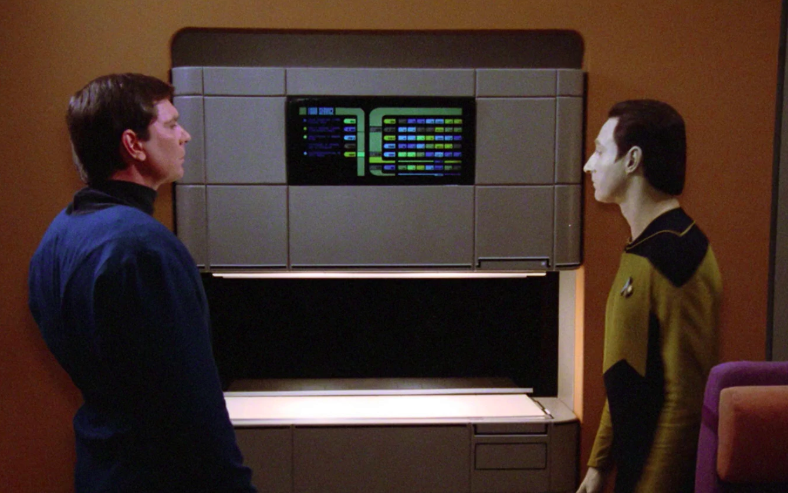
First, a digression: one of the first things you notice while getting into 3D printing is that it is far from the magic “replicator” of Star Trek, capable of spitting out molecularly-correct cups-of-joe every time. It takes a lot of research, tweaking, and stalking nerdy fellows on YouTube to figure out how to get acceptable quality prints, and even then your stuff will look pretty rough. It’s the nature of the medium… this machine is essentially a hot-glue gun on motors.
As such, I roll my eyes a bit at people who use their 3D printer primarily for making infantile decorative figurines or props. Do you really want to use up all that material, time, electricity, and post-processing hours to produce more useless plastic crap around your house? If this is the trend, future civilizations will no doubt stare in complete bewilderment at landfills full of multi-colored Baby Groots long after we’re gone.
Aww, I know, that’s mean.
Good for you if that’s your bag, but I keep my designs functional and fully understand this stuff is not “production-ready”. They just can’t have the polish necessary to survive the scrutiny of an Amazon review. So 3D printing, to me, is good for small-run niche problem-solving where looks don’t matter.
Once in a while, though, I cook up some design and when I’ve put it all together, I’m surprised that it actually looks good and is functional beyond my expectations.
Lookin’ good!
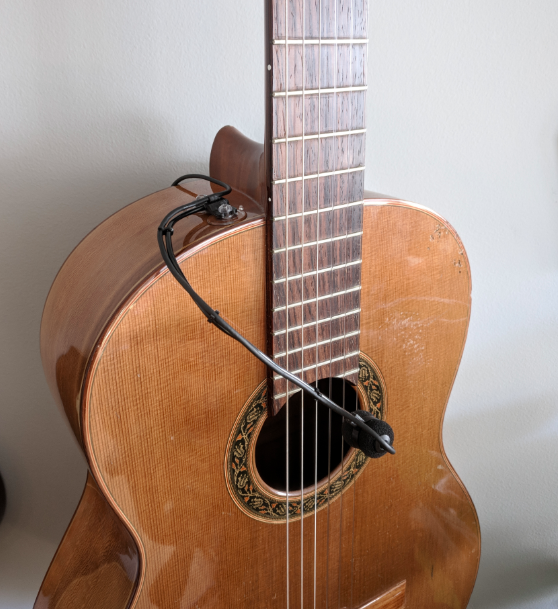
In this case, it was yet another mounting project for Audio Technica instrument microphones, which I use a lot for acoustic guitar (specifically, the Pro 70 or 831b lavalier models). I found myself wanting something that would point the mic to a sound hole or neck position with a gooseneck arm, “DPA-style“. I’ve heard some bad things about the clamping mechanisms on the DPA mounting hardware, so I thought about other ways to attach to a guitar. Why not suction cups? It worked for Nerf!
Audio Technica lavaliere condenser microphones like the PRO 70 and AT831B are good choices for amplifying acoustic guitars and reproducing the tone of the instrument more accurately than pickups. The soundhole mount that comes with is also quite nice, but after a few months of use I lost the screw and clip attachment on a gig. This made the microphone essentially unusable. I was quite annoyed to find that a replacement mount would cost around 40 bucks! That’s nuts! I mean, sure that’s some fine machining and precision metalwork there, but c’mon… we’re starving musicians here.
The solution?
I really couldn’t stomach spending that kind of dough so I decided to take the much more sensible approach of dropping $300 on a 3D printer, learning CAD off YouTube tutorials, and designing my own replacement.

 I really couldn’t stomach spending that kind of dough so I decided to take the much more sensible approach of dropping $300 on a 3D printer, learning CAD off YouTube tutorials, and designing my own replacement.