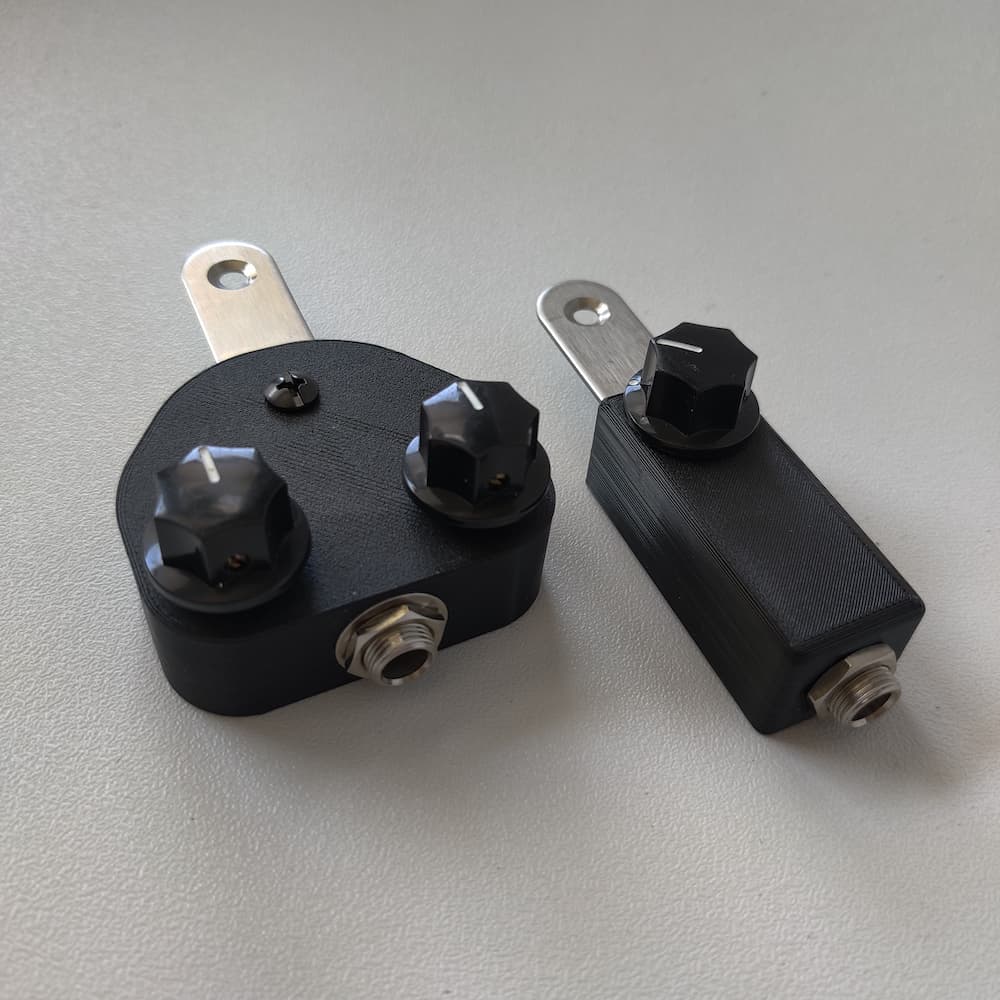
I’ve updated my volume/tone control boxes. Both have a very convenient standard 1/4″ cable output jack. No more dongle hell!
Volume/Tone control box
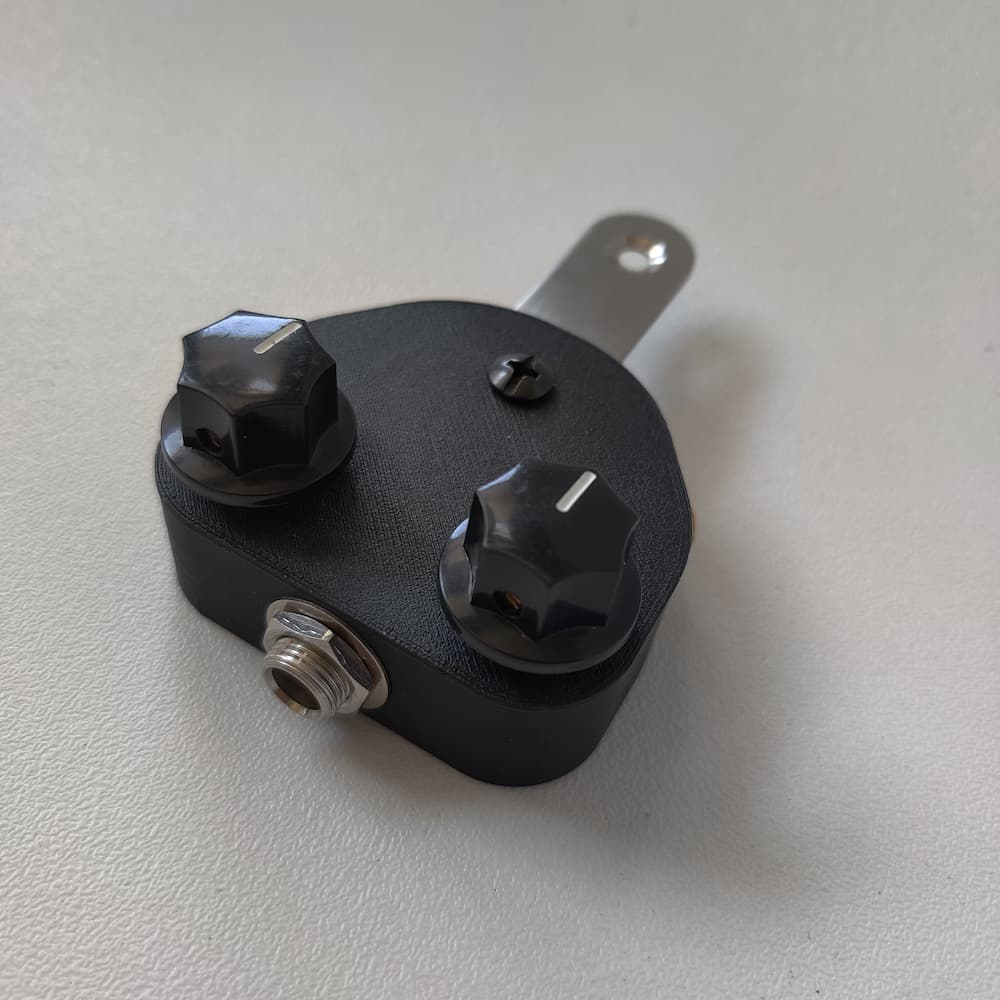
The design now more closely resembles the original DeArmond Rhythm Chief boxes, with the omission of the “Rhythm” toggle button. To be honest, I’ve had ones with this button and I’m not really sure what it does. If it changes the sound, the effect is VERY subtle, though maybe mine was broken. Do comment if you know.
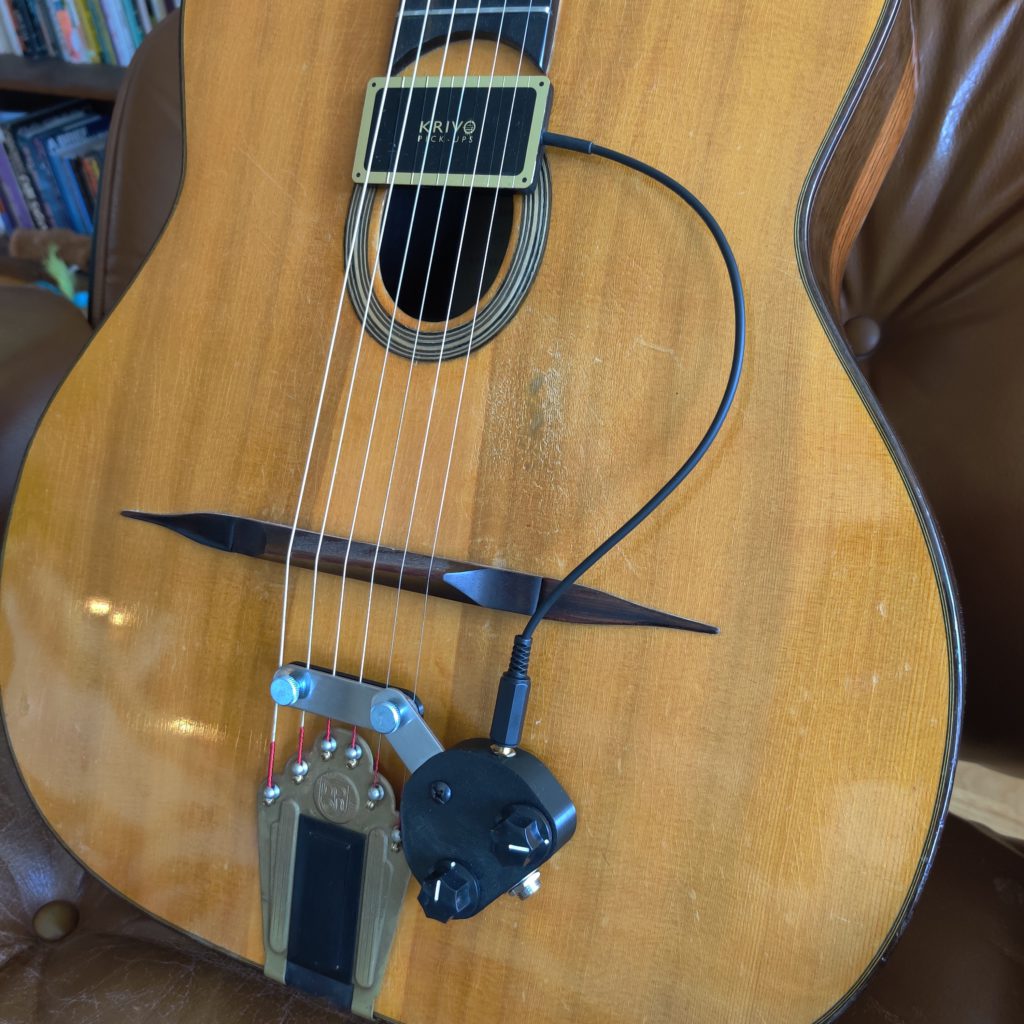
I can make them with a 1/8″ input jack for the pickup too, in case you want to add a plug to your pickup and make it detachable. Otherwise, you need to solder the cable directly from the pickup yourself. See picture below for an example using a Krivo pickup:
Available on my store here.
Volume-only control box
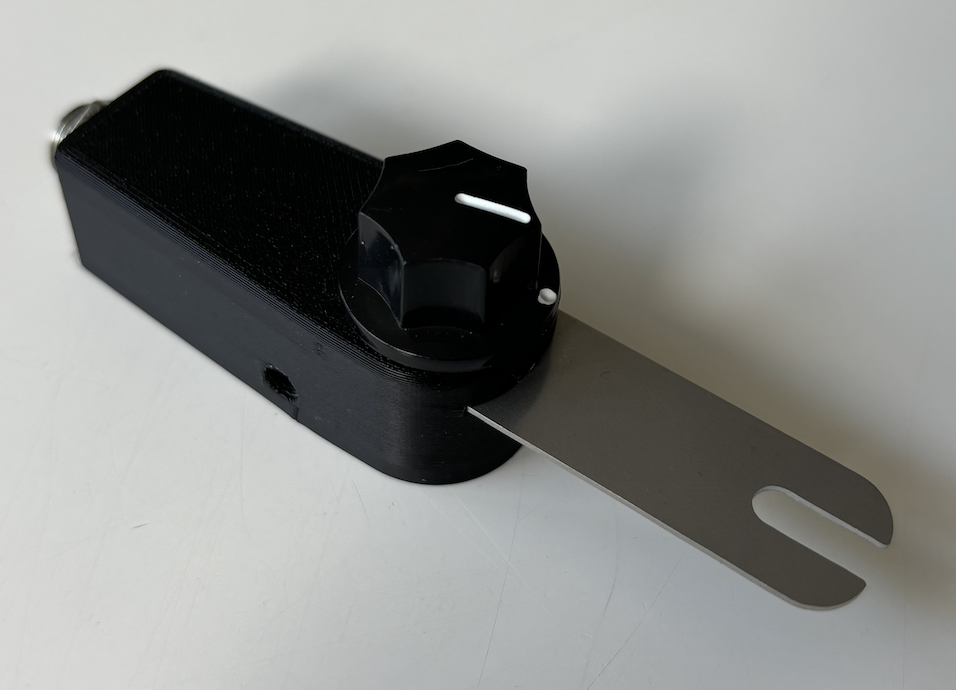
For the minimalists. A single volume knob, leave the tone to your amp and hands. 1/4″ output jack.
Available on my store here.
Tone/Vol Box Installation
Note: this is not a super-easy soldering job. There are tight clearances and tricky angles. If you’re not experienced with this kind of work, you may want to seek an expert to help.
- Pry the panel under the box off with a flathead screwdriver.
- Strip about 3/4″ off the end of your pickup’s cable and separate the hot and ground wires. The ground wire is either the shielding wire woven around the middle hot wire, or it will be colored black.
- Thread the pickup cable through the hole on the side of the unit
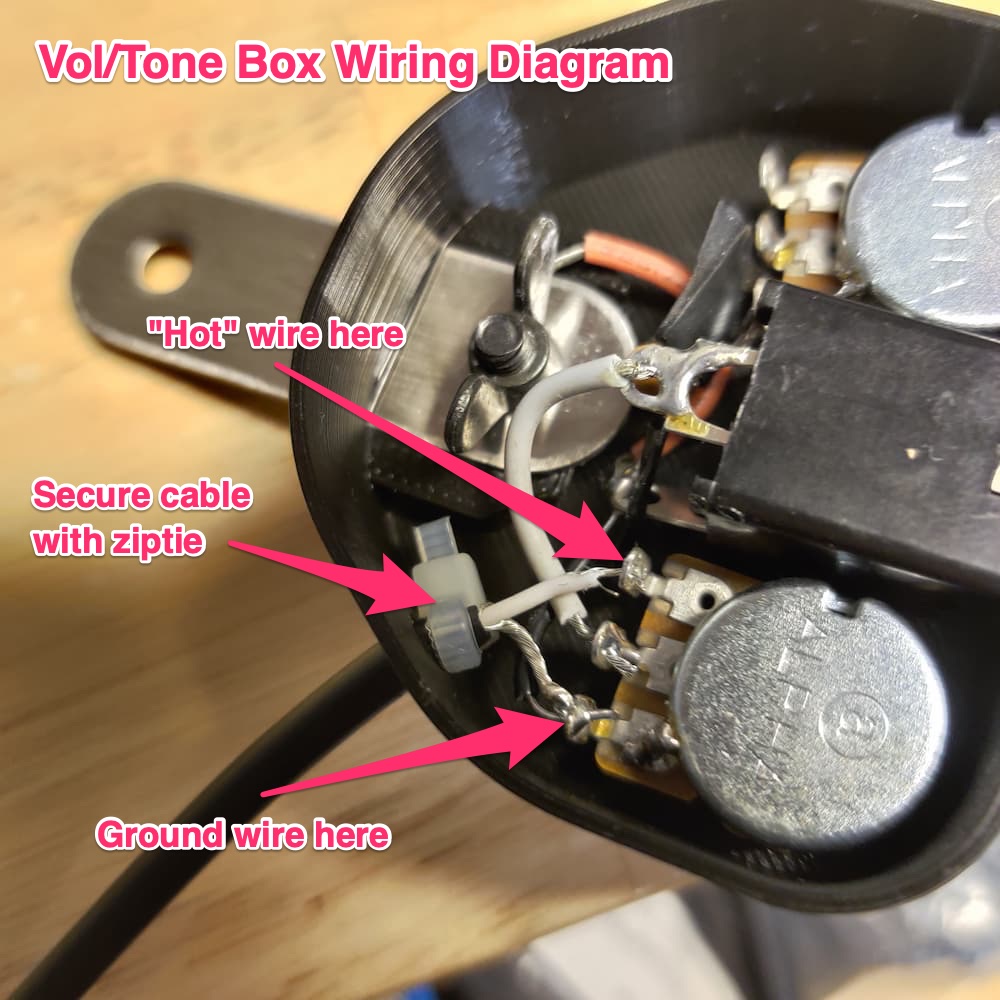
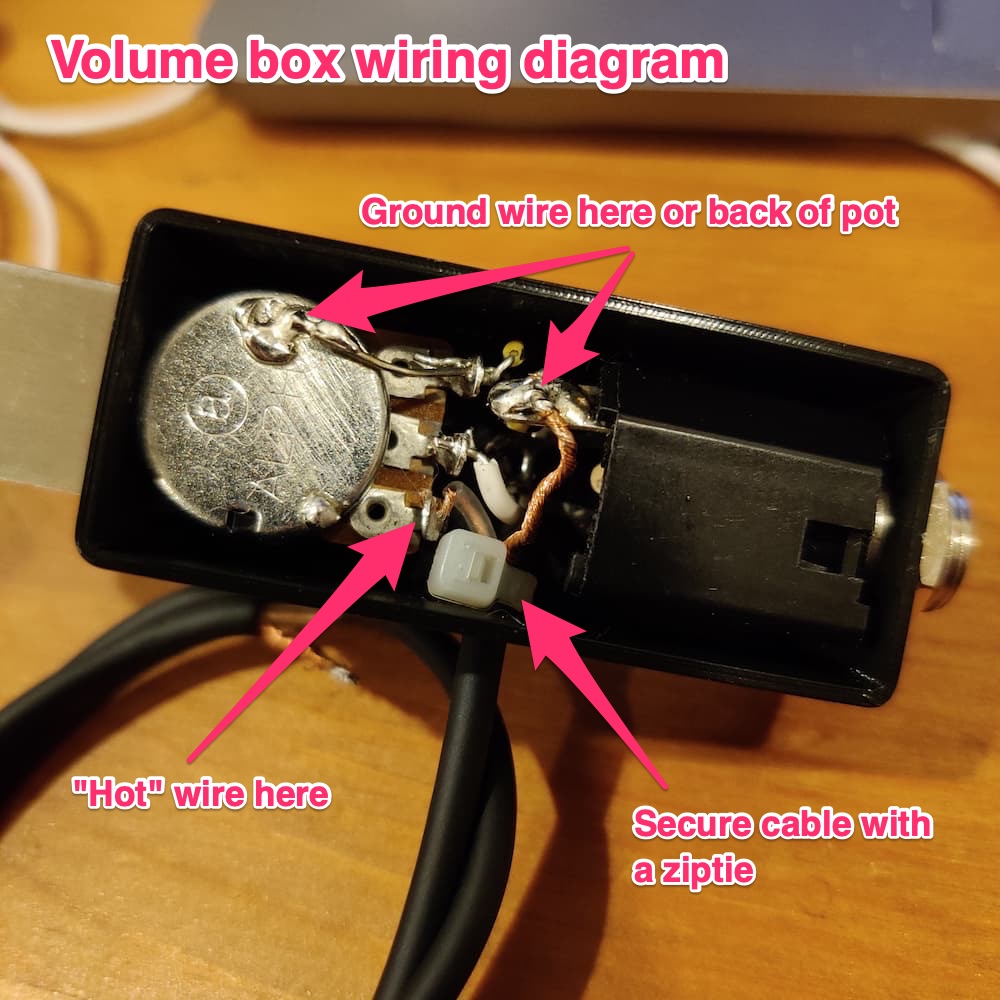
- Solder the pickup to the correct terminals:
- Tone/Volume box: You’ll be soldering to the closest potentiometer from the hole. Solder the hot wire to the furthest terminal on this pot (the same one as the capacitor), and the ground wire to the closest terminal. Do not solder anything to the middle terminal.
- Volume-only box: Solder the hot wire to the closest terminal on this pot, and the ground wire to the furthest terminal. You can also solder the ground wire to the metal back of the potentiometer, whichever is easier.
- Secure a ziptie tightly around the cable on the interior-side of the unit and cut off the extra tail of the ziptie. This will prevent the cable from putting strain on the solder joints when pulled.
- Put the panel back on and press around the perimeter to snap it into place. (If it has trouble staying, you can also put a dab of glue on the black input jack housing to keep it in place.
About the rhythm switch:
“ The controls box (which is common to both Rhythm Chief Models 1000 and 1100) comprises a brass pressing with a steel baseplate housing a volume control, a ‘tone compensator’ (a passive tone control) and a ‘Rhythm Switch’ – a push On/push Off switch manufactured by Leviton and no longer in production – that brings a capacitor into the circuit to change the tone and output.”
Yes, but how exactly did the tone change? was it just louder?
Image for the capacitors can be found here: https://www.musicpickups.com/dearmond-model-1000-non-adjustable-rhyth-chief-guitar-pickup/
Hi, you have done an excellent work, I have the original control box but these are very fine and the black box is so elegant!
Hi, I ask you what is possible to know the value of the potentiometer and if are logarithmic or linear.
Thanks and regards
500K audio taper
Hi Vic, thanks you a lot for your answer.
Best regards