The short version…
I love DeArmond archtop pickups! DeArmond “Monkey-on-a-stick” pressure rod mounting brackets are my preferred removable way to mount them, but nobody reissues them. So I made one from scratch with the help 3D printing. They are available at my online store.
I also do reproduction control boxes now: tone/volume, and volume-only. And I also sell replacement compatible top plates and thumbscrews for original vintage monkey-on-a-stick. See my store.
Video demo:
Some background…
Back in the good old ’30s and ’40s it was unthinkable to put holes in that pretty handmade archtop of yours. After all, who knew if this silly fad of guitar “electrification” was going to last? And what if you wanted to pass that pristine acoustic archtop on to your grandchildren? Trad jazz and swing was surely due to make a comeback in about 75 years.
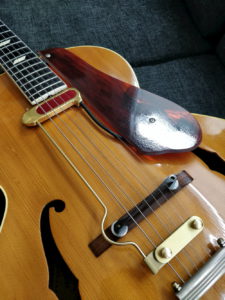
No doubt Harry DeArmond thought about all of this in Toledo home one night and came up with the removable FHC model guitar pickup. The innovation: it had a hole in the side of it that would be mounted to a “pressure rod” which would clamp onto the strings behind the bridge. Some FHC variants had a small metal box with a volume knob that would also clamp on to the mounting plate.

This mounting hardware was included through the ’50s with the next generation of pickups, the Rhythm Chief 1000 (my personal favorite, love those red accents) and the 1100 (with adjustable pole pieces).
Players found the term “pressure rod” a bit too clinical and perhaps uncouth, so they affectionately dubbed the contraption the “monkey on a stick”, after a similar-looking childrens’ toy.
(This was pre-iPad. Old-timey kids were very, very bored)
Why I love this design!
It’s impermanent! Must we take a drill to every guitar these days? I personally hate the idea of permanently modifying any instrument if I don’t have to.
It’s adjustable! You can slide the pickup up and down along the pressure rod and experiment an infinite amount of positions and the breakthrough sonic secrets/placebos they may hold.
Multiple pickups! You can add more pickups onto the same rod, if you’re kinda crazy.
It looks cool: This is a matter of taste. But I sure think so!
Why it kinda sucked…
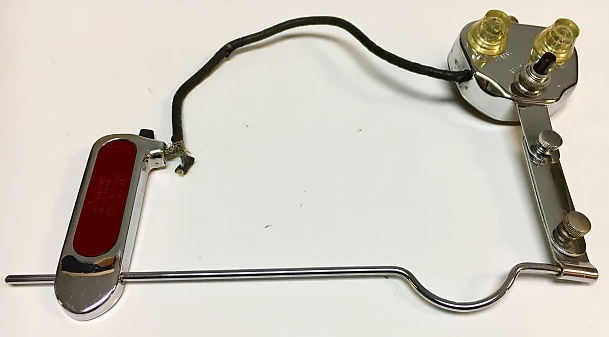
It was perhaps a pain in the ass: OK, there were a lot of moving parts. There’s the pickup itself, rod/clamp section, a top plate, and two small screws.
Putting it on your guitar the first couple of time is like surgery. And God help you if you dropped a screw and it rolled into the oblivion that is the reed section. Furthermore, when the whole thing was assembled, your guitar wouldn’t fit in its case. So you had to remove it every time to go home.
It looked awful: Again, debatable. When installed, the whole assembly made your guitar look like a hot mess of metal and cables.
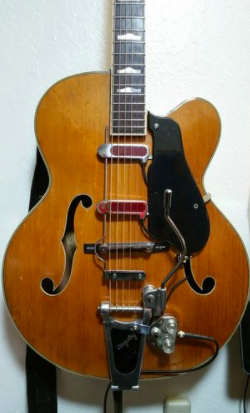
These reasons probably led to the fall of the monkey. Not to mention the fact that these wacky newcomers had no interest in respectable acoustic guitars and were no doubt getting into this electrified bebop and rock/roll stuff. Archtop guitars were soon built with permanent pickups installed. Fans on the monkey-on-a-stick sulked back to their dusty homes and spent the rest of their lives collecting 78s and sheet music while discouraging children from occupying their respective lawns.
DeArmond pickup reissues
These days, Rhythm Chief and FHC pickups have remained sought after for their classic jazz tone, and sure enough I was made a believer when I first tried one. It has a lovely warmness that still manages to cut through the band and break up at just the right volumes. It also retains a distinct tight “acoustic”-ness of the instrument when chunking out that 4-on-the-floor rhythm.
Guild recently reissued the Rhythm Chief pickups. They can be had for about $135 if you find a good deal, here’s one from Djangobooks. Having installed one onto my ’47 Epiphone, I’m happy to report that they are great and have plenty of mojo. So much so that I see no reason for most people to spend 4x as much on a rare vintage one that is likely to have some inevitable issues that come with age. The prices of vintage ones have really gotten unreasonable lately.
However, the problem is that these new guys don’t come with the much-beloved “Monkey-on-a-stick” mounting hardware, and instead ship with a rod that is meant to be drilled (*gasp*) into the neck. “No-way”, said I.
Making the Monkey
First of all, big thanks to local jazz guitarist Nick Rossi for loaning me an authentic DeArmond pressure rod to examine.
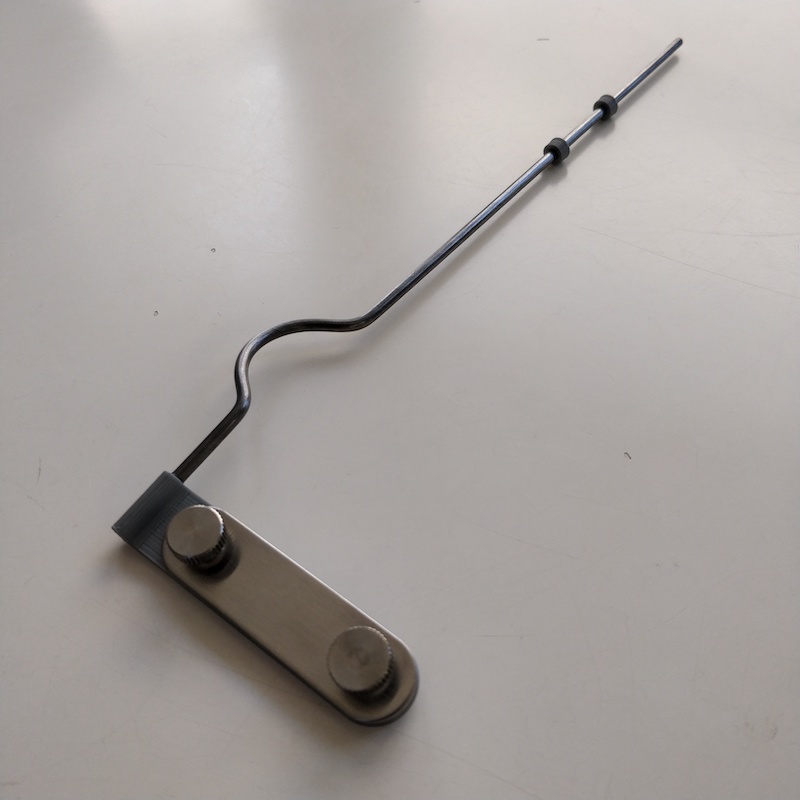
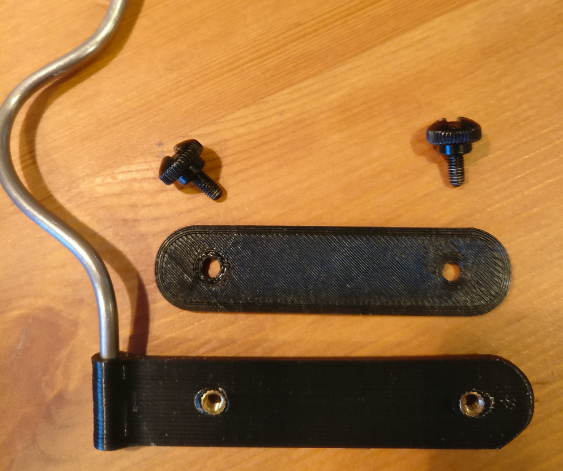
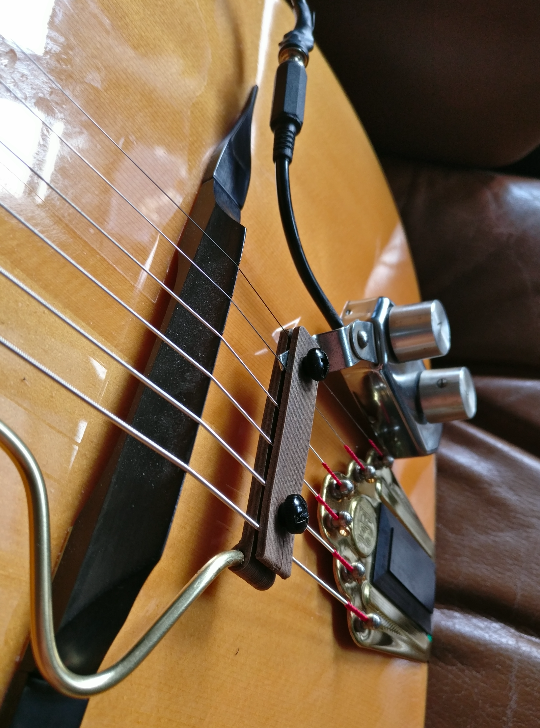
Not being particularly interested in learning or sourcing precision metalwork/welding, the design was 3D printed, much like my Audio Technica mic mounts. I took measurements of the original piece and modeled the base plates in CAD.

I secured some brass threaded inserts to the bottom plate and used some matching black thumbscrews to secure the top plate to it. The metal rod was sourced from a hobby store and hand-bent it to a good facsimile of the original curvature. It was then glued into the mounting hole of the base plate.
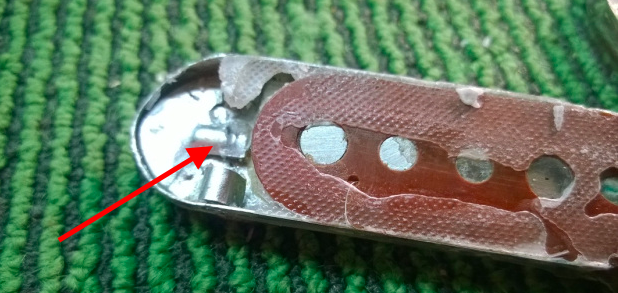
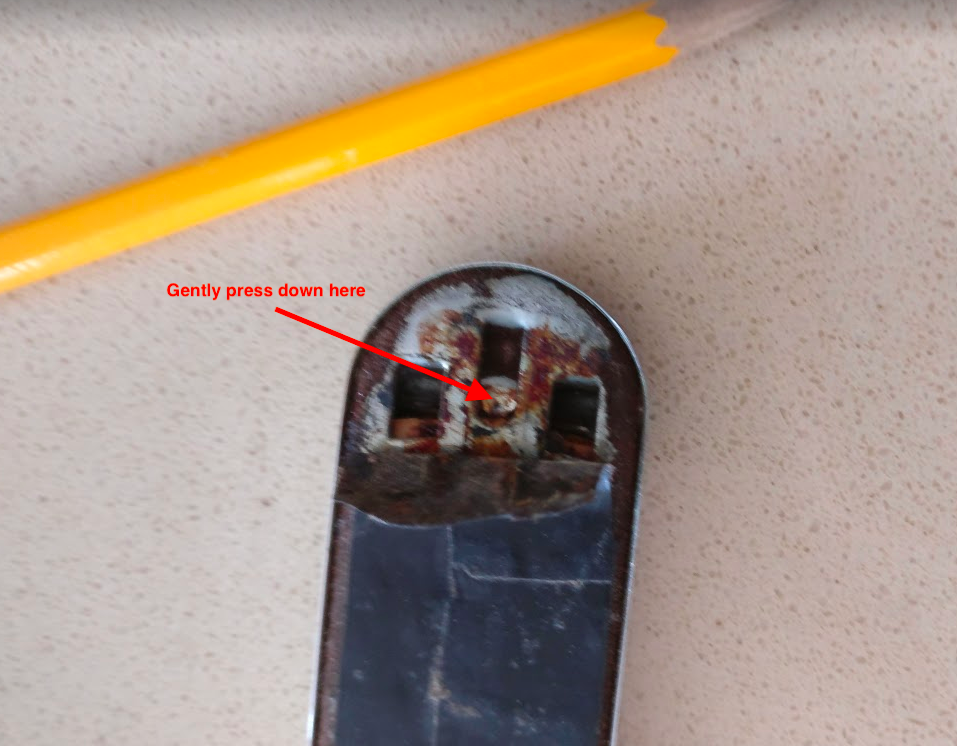
One hiccup: the reproduction rod fit the shiny new reissued Guild/DeArmond pickup nicely, but when I tried a vintage pickup it was a bit loose. Turns out, the old pickup mounting mechanism was worn out from decades of use.
Looking inside, the pressure mechanism is simply a metal tab. Bending upward will add some more friction. You can successfully do this without opening the pickup by setting pickup face down, reaching in with a flathead eyeglass screwdriver, aiming the tip towards the center and under the tab, and carefully levering it upward. It can be hard to see in there, so it may be easier to simply open the pickup if the back easily comes off.
See the pictures below for reference:
As an alternative, I combated the loose fits by printing out a couple of “pressure nuts” that have a good amount of resistance sliding on the new rod. I later sourced some rubber grommets that work even better. When the pickup is sandwiched between two of them, it doesn’t move around, which I found to be a satisfactory, non-invasive, and reasonably discreet solution.
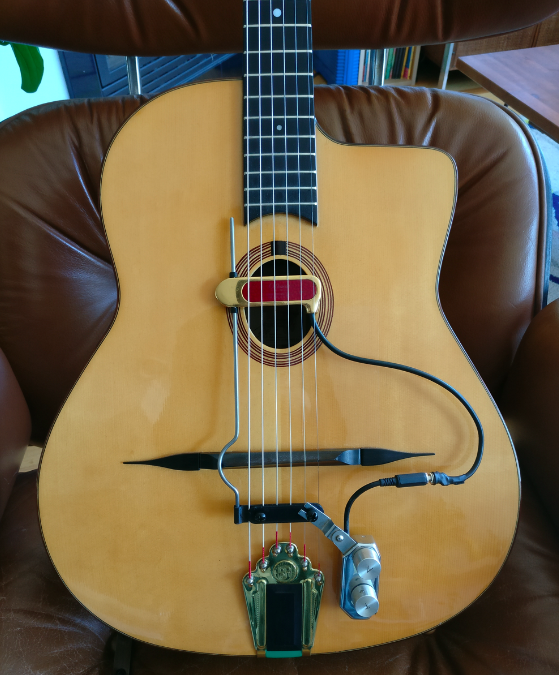
Finally, I wired the cable of the pickup with a female 3.5mm audio jack to allow it to be easily detached from the control box and cables. These were the main reason guitars wouldn’t fit in cases when DeArmonds were installed, so this took care of being able to remove them on demand.
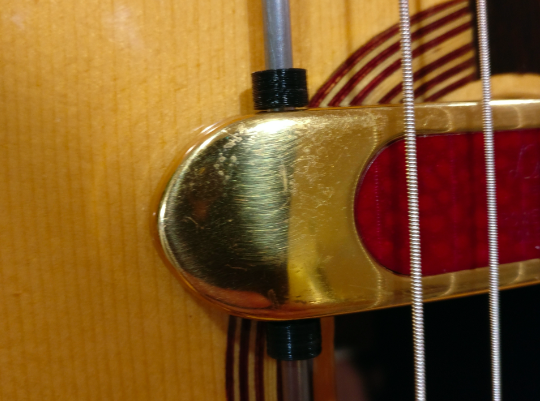
Here is the final installation:
Sure, the reproduction won’t fool a vintage guitar enthusiast but it works and you probably shouldn’t care what that guy thinks anyway and just count off the tune.
I also made some rods with a larger bend to allow for wider bridges, such as the “moustache” bridge of a Selmer-style guitar. And experimented with 3D printing other materials, such as a wood-composite PLA. But ultimately I think good old grey works best.
Want one?
I’m selling these at my online store. They come with a few pressure nuts to aid with loose-fitting vintage pickups.
Useful information on these mounts
Should you want to make or restore of these yourself, I’ll save you some time and $$:
The original thumb screws are 6-32 threaded, and 1/4″ high. You can find these from various suppliers, or from me. The rod diameter is 3.26mm in the vintage models, which is highly non-standard. You can get away with the much more common 1/8 inch diameter rods generally speaking, but if the fit is loose, you can do the metal tab bending fix I mention above. You can also get a 3.5mm rod, which is quite a tight fit, but it will go in with some encouragement. You can also mill it down to 3.3mm with a file, cordless drill, and a lot of patience.
If you want to save some time hunting this stuff down, offer replacement top plates and thumbscrews for original vintage monkey-on-a-stick. See my store.